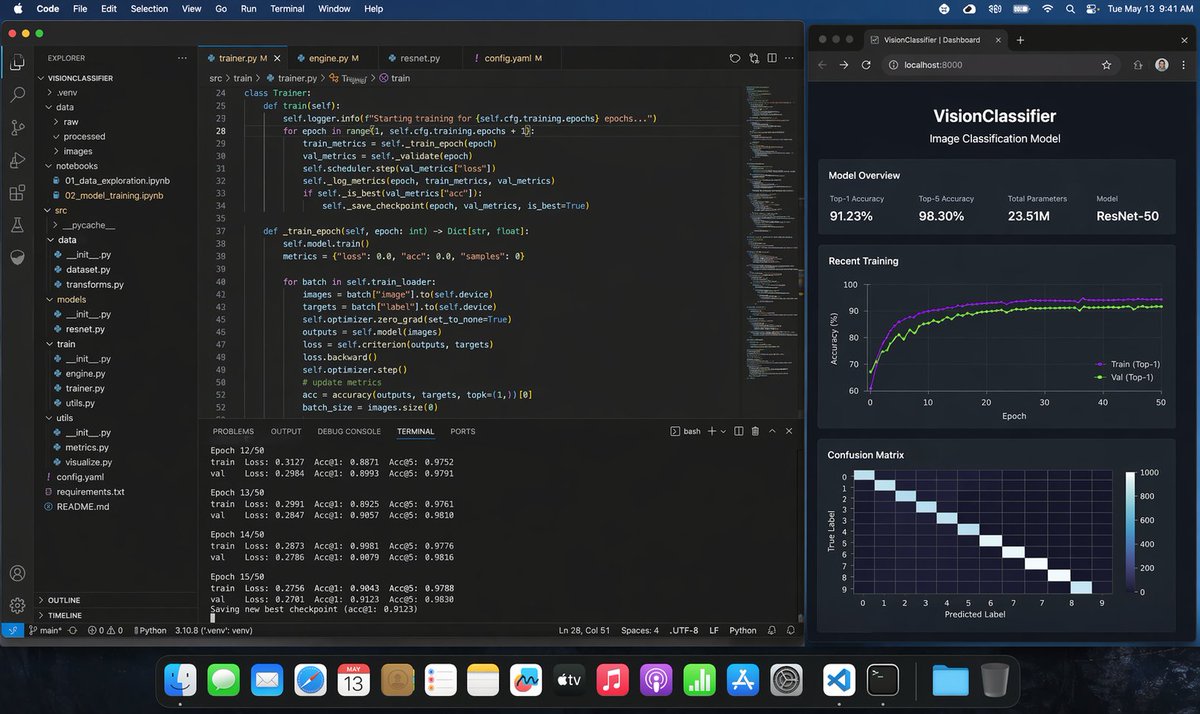
Photoreal ML Developer Desktop
Dies erzeugt einen äußerst realistischen macOS-Screenshot, der einen Programmierer beim Training eines Python-Bildklassifizierungsmodells in VS Code mit einem Live-Browser-Dashboard zeigt. Dies ist nützlich für Produkt-Mockups, Social-Media-Posts und KI-Demo-Visualisierungen.
Dies ist ein GPT Image 2 -Prompt für Produkt & Vertrieb . Verwenden Sie den unten stehenden, kopierfertigen Prompt, um ähnliche Grafiken zu erstellen, und überprüfen Sie vor der Wiederverwendung Awesome GPT Image 2 Prompts -Quellenangaben sowie die kommerziellen Nutzungsrechte.
Free 1K preview
Generate one preview image instantly, no sign-up required.
Free text preview doesn’t preserve reference-image consistency.
Eingabeaufforderung
Kopierfertige Eingabeaufforderung
A photorealistic macOS desktop screenshot of a machine learning engineer’s workspace at night, shown straight-on with a dark blue macOS menu bar and the dock visible along the bottom. The desktop contains exactly 2 main application windows side by side. On the left, a large Visual Studio Code window in dark theme occupies about two-thirds of the screen. The VS Code project is named "VISIONCLASSIFIER" in the Explorer sidebar, with a realistic Python ML folder tree including exactly 11 visible top-level or expanded items: .venv, data, raw, processed, images, notebooks, src, utils, config.yaml, requirements.txt, README.md. Inside notebooks, show exactly 2 visible files: 01_data_exploration.ipynb and 02_model_training.ipynb. Inside src, show a realistic ML code structure with dataset.py, transforms.py, models, resnet.py, train, engine.py, trainer.py, utils.py. The editor area has exactly 4 tabs open: trainer.py, engine.py, resnet.py, config.yaml. The active tab is trainer.py. Display clean, believable Python training code for a ResNet image classification pipeline, including a class Trainer, methods train(self) and train_epoch(self, epoch: int) -> Dict[str, float], references to self.cfg.training.epochs, train_metrics, val_metrics, scheduler.step, save_checkpoint, self.model.train(), batch["image"], batch["label"], optimizer.zero_grad, criterion, loss.backward, optimizer.step, accuracy(outputs, targets, topk=(1,))[0]. Make the code sharp but naturally screen-like, with line numbers visible around lines 24 to 52. At the bottom of the VS Code window, the integrated terminal is open on the TERMINAL tab and shows realistic training logs for exactly 4 epochs in view: Epoch 12/50, Epoch 13/50, Epoch 14/50, Epoch 15/50, each with train and val lines listing Loss, Acc@1, and Acc@5, plus a final line saying a new best checkpoint was saved. Keep the numbers plausible for a successful training run, with top-1 accuracy around 0.88 to 0.91 and top-5 around 0.97 to 0.98. Include the usual VS Code status bar along the bottom with Python environment details. On the right, place exactly 1 dark-themed web browser window showing a local dashboard at localhost:8000 with the page title "VisionClassifier | Dashboard" and the app header "VisionClassifier" plus subtitle "Image Classification Model". The dashboard contains exactly 3 stacked sections. The first section is "Model Overview" with exactly 4 metric cards: Top-1 Accuracy 91.23%, Top-5 Accuracy 98.30%, Total Parameters 23.51M, Model ResNet-50. The second section is "Recent Training" with a dark line chart of accuracy over 50 epochs, showing exactly 2 colored curves labeled Train (Top-1) and Val (Top-1), both rising quickly and stabilizing around the low 90s. The third section is "Confusion Matrix" showing a 10x10 heatmap with a bright diagonal and axes labeled True Label and Predicted Label. Use subtle reflections, crisp typography, realistic UI spacing, and believable screen glow. The macOS top menu bar should show common menus like Code, File, Edit, Selection, View, Go, Run, Terminal, Window, Help on the left and system icons with the time reading Tue May 13 9:41 AM on the right. The dock should contain many recognizable app icons and feel authentic but not distracting. Overall style: ultra-realistic screenshot, professional developer workstation, polished dark mode interfaces, no stylization, no illustration, indistinguishable from a real screen capture.
Best for
- - Produkt & Vertrieb visual exploration
- - Image generation and reference-image edits
- - Reusable briefs that keep source attribution visible
Change these parts
- - Subject, product, character, or scene
- - Aspect ratio, camera, lighting, and background
- - Brand, text, color, and output constraints
Recommended model and settings
- - Model: gpt-image-2
- - Input mode: Bild zu Bild
- - Aspect ratio: source
- - Commercial status: review original source
How to use this prompt
- 1. Copy the prompt and preserve its structure for the first test.
- 2. Replace the subject, context, and publishing channel.
- 3. Change one camera, lighting, or style variable per iteration.
- 4. Inspect the output, source, text, and rights before reuse.
Limitations, source, and reuse cautions
- - Generated output is an editable draft, not factual, legal, or rights evidence.
- - Review the linked source, people, brands, logos, text, and third-party media before commercial use.
Weitere Fälle in dieser Kategorie
Priorisiert nach Kategorie, Kompatibilität der Eingabemodi, Qualität und geringerem Risiko.
Hinweise zur Wiederverwendung und Quellenangabe
Verwenden Sie diese Eingabeaufforderung sicher, nachdem Sie den Fall in der Vorschau angezeigt haben.
- 1.Kopieren Sie die Eingabeaufforderung oder öffnen Sie sie direkt in Dovoo mit der Schaltfläche „Generieren“.
- 2.Passen Sie Variablen, Seitenverhältnis und Referenzbilder an Ihren Anwendungsfall an.
- 3.Vor der Veröffentlichung oder kostenpflichtigen Nutzung sollten Sie die Rechte an der Quelle, die Anforderungen an die Namensnennung sowie die Risiken für die Marke oder das Abbild prüfen.